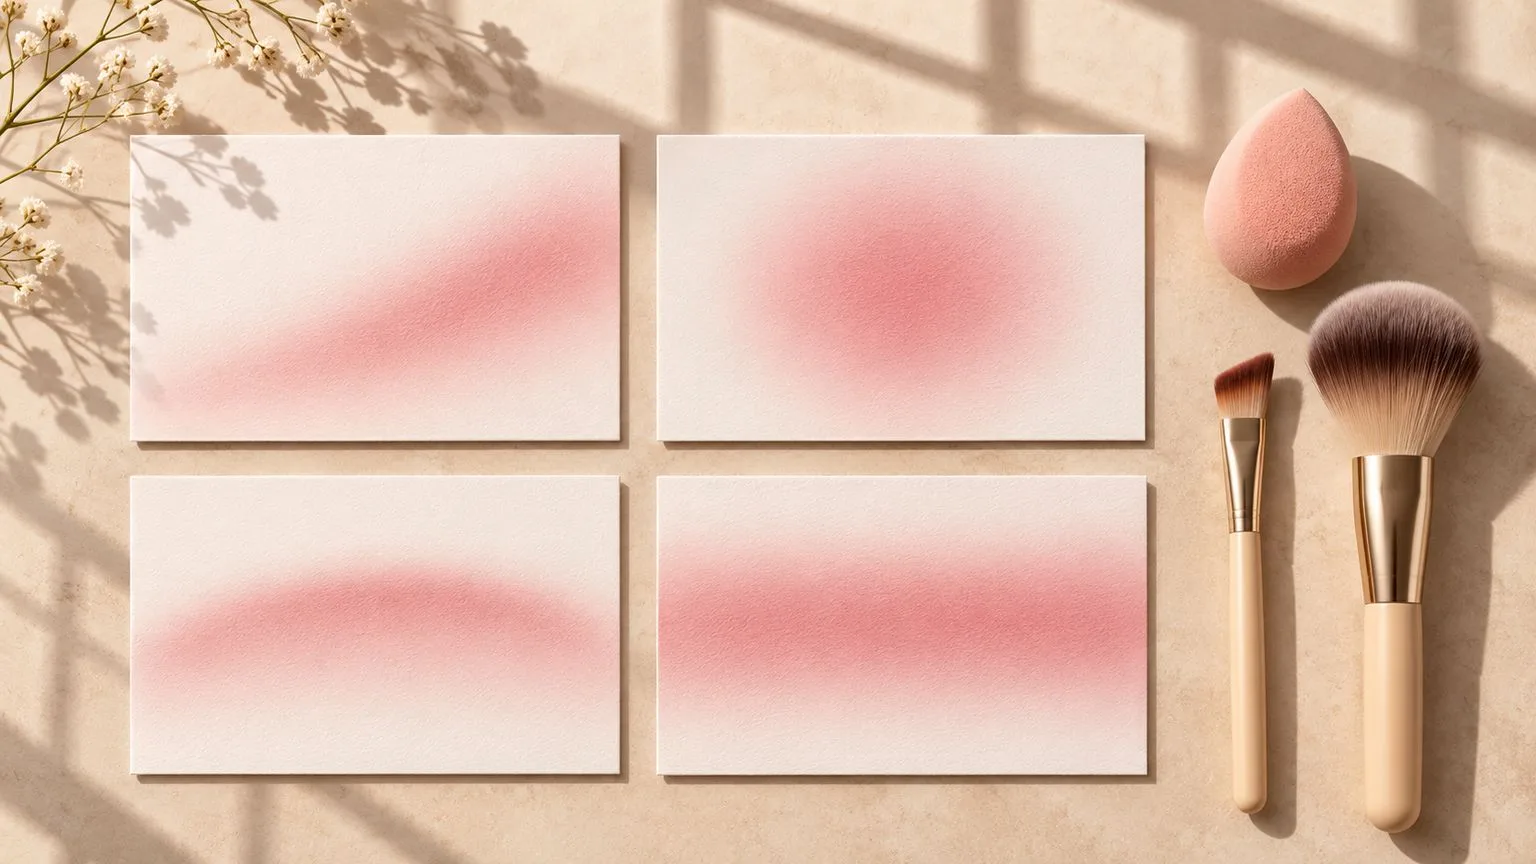
Blush placement is easier to judge when you begin with the effect you want rather than a face-shape chart. A high sweep can suggest lift, a central deposit can read as warmth, a draped edge can create structure, and a broad horizontal wash can change the visual width of the mid-face. These are optical effects to test, not fixed rules. The three variables that do the work are the position of the densest deposit, the direction of diffusion and the width of the gradient.
Placement is a decision about effect, not face shape
Face-shape diagrams disagree because their labels compress many different features into a few categories. Cheekbone height, mid-face length, the distance between nose and outer eye, and the way a person smiles can change how a placement looks more than the label applied to the face. Use a chart as a starting sketch, never as a requirement.
Look at where the brush leaves most colour, where the edge travels, and how broadly colour fades before reaching bare skin. With identical pigment and tools, moving the densest deposit upward can change the overall reading. Diffusing the same deposit downward can undo that lift. A wider gradient feels softer, but it can also occupy a larger part of the face than intended.
Four placement zones and what each one does visually
High cheekbone, diffused up and out. Start the strongest deposit on the upper outer cheekbone, then soften toward the temple. The directional edge draws the eye upward and often creates a lifted impression. The trade-off is that too much colour near the outer eye can read as an isolated stripe rather than a natural connection to the cheek.
Apple of the cheek. Keep the densest colour over the rounded cheek area and diffuse gently outward. This places warmth near the centre of the face and emphasises roundness. If the gradient is too narrow, the result becomes a circle with an obvious border; if it is too broad and low, it may visually pull the cheek downward.
Temple-to-cheekbone drape. Deposit strongest colour near the outer cheekbone or temple junction and carry its edge along a controlled curve onto the cheek. The elongated shape can read as structure, almost like a soft contour. Too much pigment at the temple can dominate the eye area, so observe the result from the front rather than relying only on a side mirror.
Across cheeks and nose bridge. Centre a light wash across the cheeks with a delicate connection over the nose bridge; keep the densest deposits on the cheeks rather than drawing a solid band across the nose. A broad, horizontal gradient creates a sun-flush impression and may visually widen the middle of the face. Watch for colour collecting around nose texture and for an edge that is too straight.
These descriptions refer to placement, not ideal facial proportions. Compare them in the same light before deciding what looks right on a particular person.
Why blush can drag the face down
A dragged-down appearance often comes from the combined effect of a low deposit, a downward blend and excessive gradient width. If colour sits below the cheekbone and fades toward the jaw, the strongest line of attention also travels downward. A large patch spreading toward the nose can make the centre feel crowded, while carrying colour too far toward the ear can disconnect the blush from the cheek.
Start by changing one variable: move the densest deposit higher without adding more colour. Keep the outer edge diffused upwards. Only then adjust the gradient's width. Photograph the result at arm's length in daylight and compare it with overhead light. The same shape can look flatter in diffuse daylight and more sculptural when overhead shadows reinforce the cheekbone.
If a stripe appears, do not keep dragging it outward with a loaded tool. Clean the tool and soften just the border. The edge-control model of pressure, load and diffusion explains why the first deposit and the later blending movement should be treated separately.
Using blush to create structure instead of contour
A deeper rose, berry or terracotta can add shape through value contrast when concentrated on the upper outer cheek and diffused towards the temple. This is a way to experiment with more blush and less contour rather than a prescription to abandon contour.
It works best when the chosen pigment produces visible tonal structure without becoming an unrelated patch. If contrast against the base is low, or strong overhead light creates dominant natural shadows, blush may not produce the sculpting effect expected from contour. Colour and depth are separate choices: hue versus saturation helps clarify how a shade reads before changing placement. Test the placement on the actual face rather than assuming deeper colour creates the same structure everywhere.
Formula and order change where blush ends up
Cream and liquid blush are often easier to integrate over a liquid foundation before heavy powdering. A wet base can move under a loaded sponge or finger, allowing pigment to migrate beyond the intended zone. Apply with a restrained first deposit and tap the outer edge; do not repeatedly sweep through a foundation layer that has not settled.
Powder blush generally behaves more predictably over a set, relatively even surface. A concentrated first contact may still create a spot that is difficult to diffuse. For wear, a thin cream layer can be followed by a small amount of powder in a similar shade once the lower layer is ready. Extra layers are not automatically better.
A fast-setting tint may leave a hard boundary if the edge is not softened before it sets. Patchiness or product rolling may instead indicate a layering problem. Do not assume the pigment itself is defective; compare with why makeup pills before changing everything in the routine.
Tools, load and edge direction
Fingers give direct placement through a small, high-contact area; pressure must stay light to avoid lifting the base. A damp or dense sponge distributes pressure over a broader patch and can remove some product while pressing. A tapered brush can place pigment along a narrower path with controlled contact. A fluffy brush spreads powder through a larger, softer contact area, but sweeping repeatedly can make the gradient wider than intended.
The practical sequence is to control the first deposit, remove excess from the tool, then diffuse only the outside edge. Press or tap when you need to retain a film underneath. Sweep lightly only where the formula and base tolerate movement. Brush density and flexibility affect pickup as well as placement; see brush shape and product pickup.
A split-face test before you commit
1. Prepare both halves of the face with the same base and let them settle equally.
2. Choose a single blush formula and shade; use the same amount and tool load on each side.
3. Put the densest deposit high on one cheek and centrally on the other.
4. Diffuse each edge in its intended direction, keeping the tool pressure comparable.
5. Photograph the front and a 45-degree angle in the same lighting.
6. Step back to arm's length and judge perceived lift, centre of warmth and border visibility.
7. Record the result and repeat later in overhead light without changing product or load.
This is a comparison of placement, not a search for an objectively superior face. A useful test changes the effect while controlling the rest.
Quick diagnosis table
| Symptom | Likely cause | Change first |
|---|---|---|
| Cheek looks dragged down | Low deposit and downward diffusion | Place densest colour higher |
| Clown-like circle | Narrow gradient on the apple | Widen only the outer fade |
| Visible stripe | Dense brush entry or sharp edge | Reduce load, soften clean edge |
| Patchy colour or pilling | Moving an unsettled base or poor layering | Let layers settle; press instead of sweep |
| Colour disappears by midday | Low film retention or worn contact zone | Test a thin cream-then-powder layer |
| Tint leaves a hard line | Rapid setting before diffusion | Work in a smaller zone immediately |
| Face looks overly wide | Broad horizontal gradient | Narrow gradient width |
Keep the variables separate: placement, diffusion and gradient width can each be adjusted without buying a new product or adopting a rigid face-shape rule.